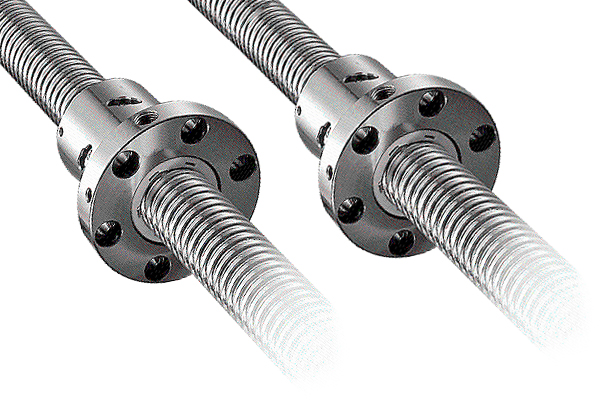
CNC machine Introduction and application of ball screw part.2
5) main parameters:
Main parameters of thread
(1) outer diameter d (large diameter) (d) -- the diameter of the imaginary cylinder superimposed on the top of the external thread -- also known as the nominal diameter
(2)D1 (d1) -- the diameter of the imaginary cylinder that coincides with the bottom of the external thread. Calculate the diameter of the dangerous section in the strength calculation
(3) medium diameter d2 -- the diameter of the imaginary cylinder in the axial section where the tooth thickness is equal to the width between teeth, approximately equal to the average diameter of the thread, d2≈0.5(d+d1)
(4) pitch P -- the axial distance between two adjacent teeth corresponding to two points on the bus of the mid-diameter cylinder
(5) lead (S) -- the axial distance between two adjacent teeth on the same spiral line and the corresponding two points on the bus of the mid-diameter cylinder
(6) number of lines n -- number of spiral threads, generally for the convenience of manufacturing the relationship between n≤4 pitch, lead and number of lines: S=nP
(7) helix Angle bits - in the pitch diameter cylinder helix tangent and perpendicular to the plane of the helix axis Angle.
(8) tooth-type Angle -- the included Angle between the two sides of the thread type in the axial plane of thread 9) tooth-type oblique Angle -- the included Angle between the side of the thread type and the vertical plane of the thread axis.Symmetric teeth type
The main geometrical dimensions of various threads (except rectangular threads) are available in the relevant standards-nominal dimensions are the outer diameter of the thread to the pipe thread approximately equal to the inner diameter of the pipe.
The self-locking condition of the screw pair is: the thread rising Angle is less than or equal to the equivalent friction Angle of the screw pair.
The transmission efficiency of the screw pair is: the ratio of effective work and input work when the nut is rotated once.
The circumferential force required to overcome the uniform rise of the axial force Q
6) testing and maintenance
Ball screw failures are various and have no fixed mode.Some of the faults are gradual, there should be a development process, with the increase of use time more and more serious;Sometimes is the sudden failure, generally no obvious signs, and suddenly occur, this kind of failure is a variety of adverse factors and the outside world together.Therefore, it is the premise of rapid and accurate maintenance to determine the real cause of failure through correct detection.
(1) check and repair the clearance of ball screw nut pair and support system
When the
CNC machine tool appears the reverse error is big, the positioning accuracy is not stable, the quadrant appears the tool mark, must first detect the lead screw system has the clearance.The detection methods are as follows: dial gauge with steel ball placed in the center hole at one end of the lead screw, measure the axial movement of the lead screw, and measure the movement of the working table with another dial gauge.Rotate the lead screw forward and backward, observe the values reflected on the two dial gauges, and confirm the fault location according to the different changes in the values.
A) check and repair the clearance of lead screw support bearing
If the dial indicator measuring the lead screw does not swing when the lead screw rotates forward and backward, the lead screw does not move.If the dial indicator pointer swings, the lead screw has a channeling phenomenon.The difference between the maximum and minimum measurements is the distance of the axial movement of the lead screw.At this time, we will check the support bearing back cap is locked, support bearing is worn and failed, preloading bearing washer is appropriate.If there is no problem with the bearing, just rearrange the pre-loading washer.If the bearing is damaged, it is necessary to replace the bearing, reassemble the pre-loading washer, and tighten the back cap.The axial movement of the lead screw mainly depends on the precision of the bearing preloading washer.The most ideal condition of screw mounting accuracy is no positive and negative clearance, and the support bearing should have about 0.02mm interference.

B) inspection and maintenance of the clearance generated by the double nut pair of ball screw
Through the detection, if the fault is not caused by the lead screw movement.It is necessary to consider whether there is a gap between the screw nut pairs. In this case, the detection method is basically the same as the detection of the screw movement.Use a dial indicator to measure the
working table connected with the nut, turn the lead screw forward and backward, detect the maximum clearance between the lead screw and the nut, and then adjust it.
The method is shown in figure 2. The thickness of gasket 4 is adjusted to make the axial displacement of left and right nuts 1 and 2, so as to eliminate the clearance between the pair of ball screw nuts and generate the pre-tightening force.Because the screw nut pair structure is different, so the adjustment method is different, here is not a list.
C) detection and maintenance of single nut pair
For single nut ball screw, the clearance between screw nut pairs is not adjustable.If the screw nut pair is detected to have clearance.First, check whether the thread arc of the lead screw and nut has been worn. If it is seriously worn, the full set of lead screw nut must be replaced.
If you check for minor wear, you can replace the ball with a larger diameter to repair.First, the maximum clearance of the screw nut pair was detected, which was converted into the increase of ball diameter, and then the appropriate ball was selected for reassembly.Such maintenance is relatively complex, takes a long time and requires a high level of technology.
D) the gap between the nut flange and the workbench is not well fixed
This problem is generally easy to be ignored, because the machine tool long-term reciprocating movement, fixed flange disk screw loose gap, in the inspection of the screw nut gap at the highest to eliminate the fault factors first, so as to avoid detour in the repair.
E) maintenance of ball screw nut pairs with uneven movement and excessive noise.
Ball screw nut pair movement is not smooth and noise, mostly due to poor lubrication, but sometimes due to the servo motor drive parameters are not adjusted.
(2) bearings and screw nut pairs are not well lubricated
Machine tool in the work such as noise and vibration, in the detection of mechanical transmission part no problem, the first to consider the problem of poor lubrication, many machine tools after years of operation, screw nut automatic lubrication system is often blocked, not automatic lubrication.High temperature and high speed resistant grease can be added to bearings and nuts to solve the problem.The grease can guarantee the normal operation of bearings and nuts for several years.
(3) servo motor drive problem
Some
machine tools in the movement of vibration and creep, often detect mechanical parts are no problem, no matter how adjustment can not eliminate vibration and creep.After careful inspection, it is found that the servo motor drive gain parameter is not suitable for the actual operation.After adjusting the gain parameters, vibration and creep can be eliminated.


